
Who does not want to be the most searched and highly followed online streamer? Almost all of you will say yes if you are a live streamer, no matter what level. Undoubtedly live streaming has become the most prioritized type of business and professional work.
In this era of the internet and technology, no one of us is unaware of lifestreaming. Moreover, many of us are those who are professionals in this field. But still, there are many things that you need to know to be an ideal online streamer.
As a live streamer, you must be aware of many different things and basic settings that are necessary to keep your followers intact with you throughout your streaming. Luckily you are the one who has reached here. You would not be the same streamer after getting all we have for you. We have got you all that you need to be an ideal live streamer.
No live streaming is perfect without OBS. Go to the following details very keenly and attentively to learn every aspect of OBS. So you would soon be an ideal and highly watched online streamer with the highest number of followers.
How to Configure OBS Streaming Settings?
This is the right place to get the best streaming settings for you for your favorite OPEN BROADCAST SOFTWARE (OBS).
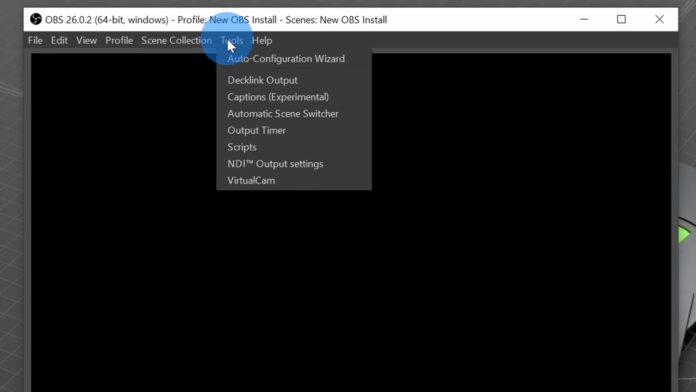
What Is OBS?
OBS is the most famous and popular streaming software with compelling inbuilt programming. The software is entirely free of cost and has an RTMP-enabled encoder (which makes your audio, and video highly efficient and functional for the transference of this data from an Encoder to a server).
This software is Mac and Windows compatible and can be used for live streaming from any Windows or any MAC at any time with proper internet speed. This OBS not only streams video but also allows you to capture and live stream at a time.
So, let us move on to all the essential and standardized OBS Studio Settings necessary for you to make your audience look at you without blinking their eyes because of your perfect quality video performance.
1. Output Settings
Output settings are the most essential and basic settings you need to get higher quality live streaming. This will affect your final results of streaming. This area contains the majors and basic settings. Never ignore the output settings when you are using OBS.
Select the output mode to advanced settings for more precise and more refined settings.
Audio Track
Select the audio track to 1.
Encoder
I will recommend you to select the new NVIDIA NVENC H.264. This is a highly appreciated card that performs multitasking and covers both streaming and gaming at a time if you are a gaming streamer.
If you do not have the card available, then there is another option for you. In that case, you should have to use a potent PC for your streaming. Go with the x264 to get perfection in your videos for your CPU.
Rescale Value
Keep in mind to keep the rescaled value always unchecked.
2. Audio Settings
Not only the video settings and quality is essential, but also the audio settings and qualities are of high importance in attracting your viewers. Always keep in mind that nobody is free enough to watch you throughout your streaming but people will stick around if you have excellent audio quality. If they are busy, they can multitask here, keep listening to you, and do their work both at a time.
Here are some suggestions for you to select the best quality settings.
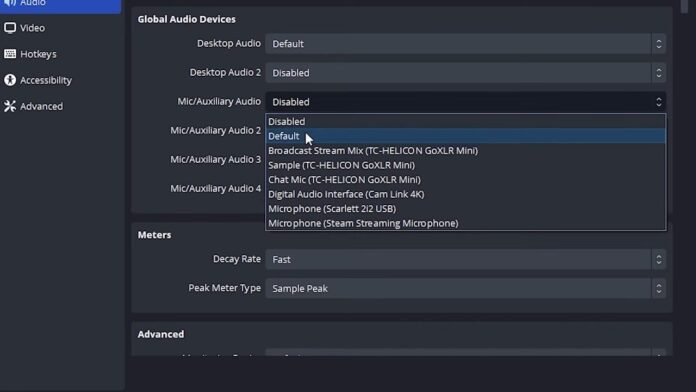
Open general settings and select 48kHz in the sample rate.
Make sure you have selected the stereo audio settings for your channel.
Open the Global Audio Devices Section and select the best suitable audio quality for you. It is different from one person to another.
Let us guide you with an example if you use multiple devices for your streaming, then apply a Microphone device or desktop audio.
In this way, you would set the best quality audio settings for your OBS studio for your live streaming.
3. Video Settings
Video settings play an essential role in live streaming. If your video quality is not attractive and appealing for the users, you will not gain attention, and your fans will not stick to you. Here are the video quality settings for you to get the best quality of your video during live streaming.
Most probably, you will find these video settings under the section where there is a video resizing option, and the option of resolution changing is available.
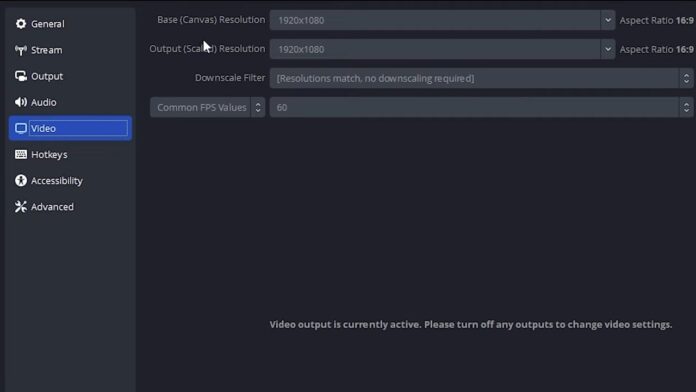
Base Resolution And Output Resolution
The Base Resolution is basically the size of the display your picture will take for your live streaming. Whereas, the output is the resolution of your streaming.
For 720p streaming, you should select your base resolution of 1280×720.
Furthermore, for 1080p output resolution streaming, you should go with a 1920×1080 base resolution.
Downscale Filter
The downscale filter in this list depends on how you are going to downsize your filter significantly when you are reducing from higher resolution to lower resolution. There are two highly recommended options for the selection of a perfect downscale filter which depends upon the power of your PCs.
Go with the selection of Lancsoz if you are using a really high-power PC because this setting provides the quickest and very clearly sharpened video quality.
Go with Bicubic settings when you are live streaming on a low-power PC.
Frames Per Second
Then we have frames per the second option, and this is the last option in the settings. Make sure to set your frame in somewhere between 40 to 60, but the best quality and the most used frames per second is 60. This will give you a clear picture quality that attracts the users more than any other setting.
These video settings will give you a watch time higher than ever recorded. Moreover, make sure to keep the standard-setting safe for you. You can amend the neighborhoods if you think there is a requirement for something different.
4. Bitrate Settings
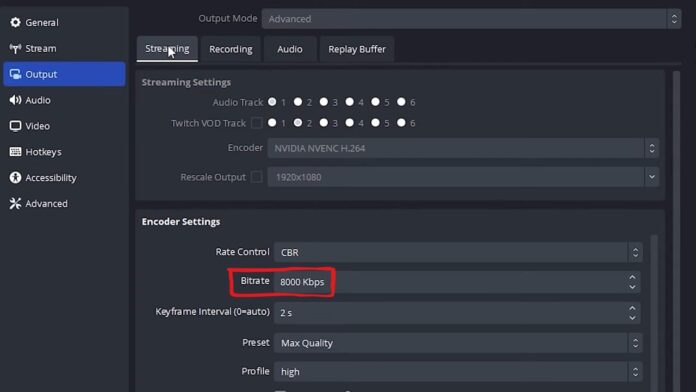
Bitrate is the transference of bits from one place to another. And bits are used to measure the data which is transferred, so basically, the bits are the count of transfer of data from one place to another. The bitrate basically depends upon the efficiency of your internet connection and the speed your internet is providing to you. It is the upload speed of the internet.
The standardized ideal speed of your internet should be 5000kbps for perfection in live streaming. This is the perfect speed of the internet which gives ideal uploading throughout your streaming. Alternatively, if you are unavailable with the 5000 kbps speed of the internet, you can go with a minimum of 3 Mbps speed.
There is a trick to get the best professional live streaming. Your audio bitrate and video bitrate, when combined, should have a lower value than your overall uploading speed of the internet. In this way, you would be able to get the best OBS Studio settings.
Audio Bitrate
For more precise sound quality, you should select the higher audio bitrate available. Moreover, keep in mind that your frame per second also affects your audio quality.
Remember, the higher the quality of your video, the higher the audio bitrate should be for more perfect and more explicit live streaming. Make many test streams to get perfection in your live streaming because there is no definite rule that we should follow for audio bitrate.
Video Bitrate
The video bitrate is already set to 2500 in the default settings of the OBS. 2500 comes in medium-scale because the scale ranges are 400 to 8000.
There are different video bitrates for different settings. For pixel perfection, you should go with the maximum bitrate of the video available. Keeping in mind all of these factors and standard settings, make a check and then go with the best video bitrate which you think is perfect for your video quality
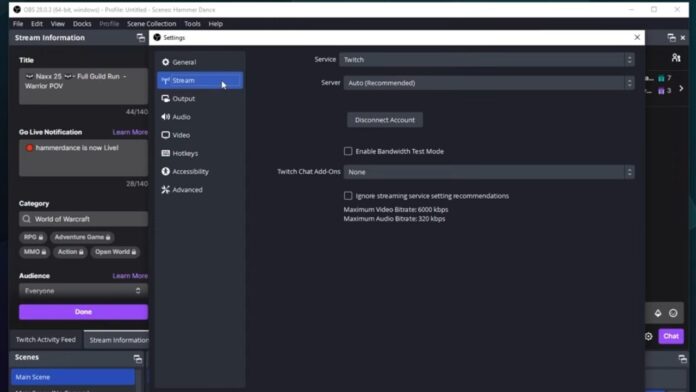
5. Advanced Streaming Settings
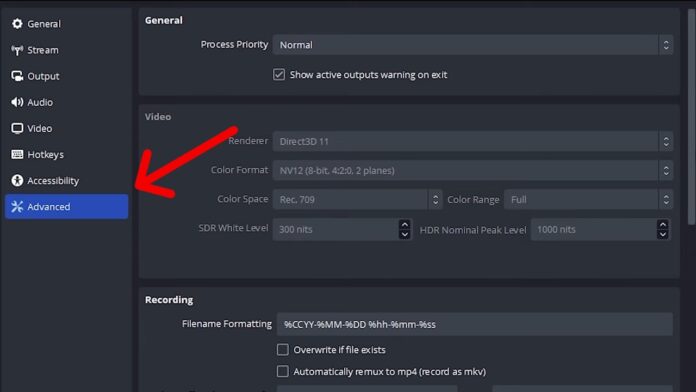
There is this option of advanced streaming settings available in obs for you to make advanced level settings to get higher quality live streaming results. Following are the two basic types of advanced-level settings that you should focus on to reach perfection.
Keyframe interval
Keyframe intervals are different from regular frames or frames per second. Keyframes explain the starting and ending separation points of the shots. It is basically the time of the new appearance in your transmission. Keyframes and frames per second are totally different from each other.
Set the keyframe settings to 2 or 3 seconds; it’s the highly recommended settings for a good experience of live streaming. For your understanding, I will explain with an example that if you have 60 frames per second settings, it doesn’t mean that you have 30 keyframes in it.
Suppose your keyframe setting is set to be on for 3 seconds, then the new viewer who has joined you recently will wait for 3 seconds before the streaming appears for him.
Encoder Preset
The encoded preset value is the value that depicts the power which the CPU gives to encoding. If the preset value is higher than the time that the CPU will take, encoding is lower and vice versa. Moreover, if the CPU encoding time is higher, then the video quality would be lower.
So in order to take the video quality to the highest level, you need to set your CPU to spend lower time encoding. Therefore you should have a lower encoding preset time to have high streaming-quality performance.
FAQs
What is a good bitrate for recording OBS?
The recommended bitrate for recording OBS (Open Broadcaster Software) depends on several factors, including the resolution and frame rate of the video being recorded, the complexity of the content, and the desired quality of the final recording. However, as a general guideline, the following bitrates are often recommended:
- 720p resolution, 30 frames per second (fps): 2000-4000 kbps
- 1080p resolution, 30 fps: 4000-8000 kbps
- 1080p resolution, 60 fps: 6000-12000 kbps
Higher bitrates result in larger file sizes and require more processing power to record and edit, so it’s important to balance the desired quality with the practical limitations of your computer system and storage capacity.
It’s also important to keep in mind that higher bitrates may not necessarily result in better quality if the content being recorded is simple or has a low level of detail. It’s a good idea to experiment with different bitrates and recording settings to determine the optimal settings for your specific needs.
What are the best OBS settings for a low-end PC?
If you have a low-end PC, it can be challenging to find the best OBS settings to record or stream without causing lag or dropped frames. Here are some recommended OBS settings for a low-end PC:
- Video settings: Set the Base and Output resolution to 720p or lower, and the frame rate to 30fps. Use the Lanczos or Bicubic downsampling filter for scaling.
- Encoder settings: Select the x264 encoder with a bitrate of 2500-3000 kbps, a preset of very fast, and a keyframe interval of 2. Use the Main profile and set the Tune parameter to none.
- Audio settings: Use the AAC codec with a bitrate of 128 kbps and a sample rate of 44.1 kHz. Use mono audio instead of stereo to reduce processing requirements.
- Advanced settings: Disable encoding while previewing, and use the NVENC encoder if your PC has an Nvidia GPU.
By using these OBS settings, you can optimize your recording or streaming performance on a low-end PC. It’s important to note that the exact settings that work best for your system will depend on factors such as the specific hardware configuration, the complexity of the content being recorded or streamed, and the desired level of quality. It may take some trial and error to find the best OBS settings for your specific needs.
Is it better to record with OBS or Streamlabs?
OBS (Open Broadcaster Software) and Streamlabs are both popular software options for recording and streaming video content, and each has its own advantages and disadvantages.
OBS is open-source software that provides a wide range of customization options and is highly versatile. It can be used to record or stream video and audio content from a variety of sources, including webcams, microphones, and game capture devices. OBS allows for a high degree of control over the encoding and processing of the video content, which can result in higher-quality recordings or streams.
Streamlabs, on the other hand, is a more user-friendly option that is specifically designed for live streaming. It includes a range of features that are optimized for live streaming, such as alerts, overlays, and chat integration. Streamlabs is also integrated with popular streaming platforms like Twitch and YouTube, making it easy to go live with just a few clicks.
Ultimately, the choice between OBS and Streamlabs will depend on your specific needs and preferences. If you are looking for highly customizable and versatile software that allows for a high degree of control over the recording or streaming process, OBS may be the better choice.
However, if you are looking for a more user-friendly and streamlined option that is optimized for live streaming, Streamlabs may be the better choice. It’s also worth noting that both software options are free to use, so you can try them out and see which one works best for you.
Conclusion
OBS is an efficient and highly recommended software used for better quality live streaming performance. The very impressive characteristic of this system is that it is free so you can sample streams many times without any investment. Before getting started, make these above-recommended settings so you’ll be able to get the quality performance of your live streaming.
Always keep in mind your fans consider you the best and demand the best from you. They make you their ideal and follow you.
Keeping it in mind, your streaming should be professional and have specific vital characteristics to keep your followers interacting with you. This concludes that you should have good video quality, good audio quality, perfect bitrate, and correct output settings. These settings will provide you with all of these.


