
Making electric connections and wiring some devices seem like tiring tasks to do. But if you are here, it means you are ready to get familiar with the whole procedure and get into it. You might know that multiple color codes exist for the wires connected with fixtures. The electrical standards applicable in one country might be different from yours.
For instance, in the United Kingdom, black color is assigned to a neutral wire. The opposite code exists for the same wire in America. Therefore, it is essential to first have some know-how about the nature of wires to allow the successful completion of your job. To help you in this process, I have listed all the important steps for connecting a luminaire having two black wires.
Materials Required
Pliers
You will need the pliers to secure the wire connections. This action prevents the failure of the fixture and fire hazard. Twist the wires to make the connections tight. In addition, this tool also allows the formation of neat connections when you cut the wires and eliminate the protruded parts.
Screwdriver
Any installation involving wires needs a screwdriver, the main function of which is to tighten the screws and hold them in their positions. Like pliers, this material is necessary for making better connections that are long-lasting. Some screwdrivers come with an interchangeable tip or head, making them versatile for both smaller and larger screws.
Voltage Tester

Several good-quality non-contact voltage testers are available in the market. Their purpose is to test that the device is not drawing any voltage during its adjustment and fitting process. Moreover, they also facilitate providing information about the neutral and hot wires. It is crucial to use them in procedures involving wires to prevent one from getting an electric shock.
Multimeter and Voltmeter
The function of both the voltmeter and the multimeter is to analyze the circuits and the voltage. The information is displayed on a screen, after which a person can fix the product.
A multimeter provides data regarding various characteristics, including resistance, polarity, and voltage. So, if you have this instrument, it will be sufficient for measurement.
Wire Nuts
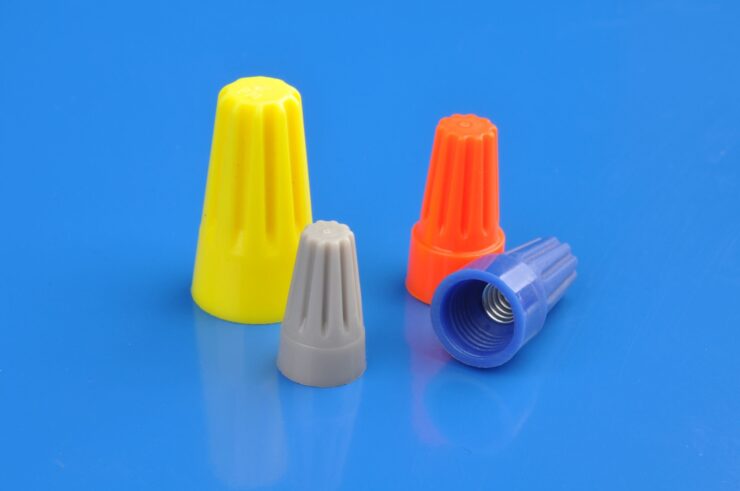
You will need the wire nuts or twist-on-connectors for securing the electric connections through which less voltage is flowing. They allow you to fasten these connections that provide insulation. Other terms for this tool are thimble connectors and cone connectors. Generally, orange nuts are common when dealing with light or fan fixtures.
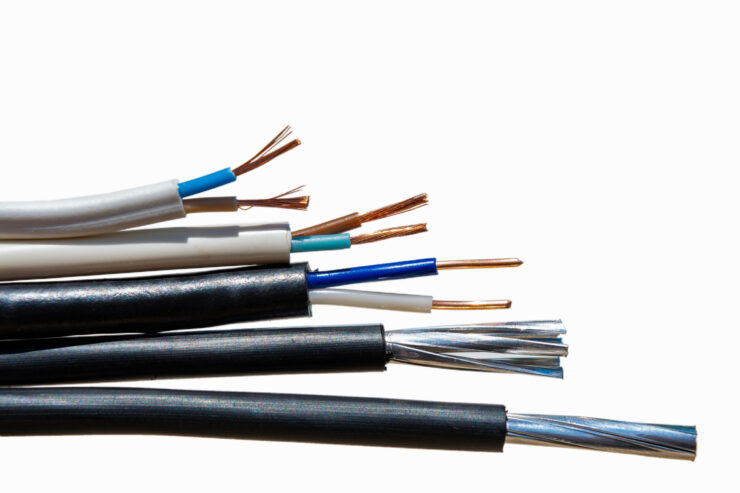
Striper
As their name suggests, the strippers are needed to remove the wire sheaths. It will expose the copper inside to form connections with other wires. The blades on these tools make it convenient to remove the skin of cables. They are also beneficial for repairing the cables as well as replacing them.
Wiring Procedure
Make sure to follow the guidelines for doing this task safely. I have mentioned some significant pointers at the end of this article to help you avoid any kind of mishap. While wiring, if you feel like getting assistance from an electrician, do not hesitate to contact him. Since this is your first time, I recommend that you get help.
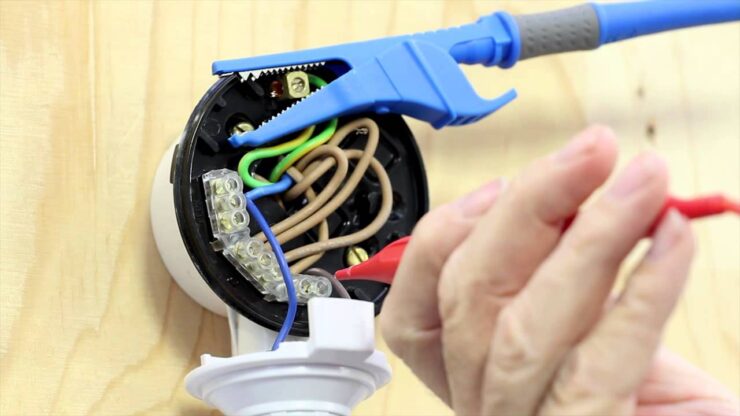
Identification of Wires
The initial step is to get familiar with the types of wires you are dealing with. For this purpose, place a phase tester or the multimeter and test the wires on the ceiling. Usually, they are of white and black colors. To supply the alternating current to the light source, an individual will have to connect black wires emerging from the fixture interchangeably.
Moreover, some readers might notice different markings on these two wires. These symbols indicate whether a wire will be connected to a hot wire from the ceiling or the neutral one. Mostly, the black wire with the text “voltage” on it is for the hot wire.
Similarly, the one having the rough texture is generally the hot one, while the other wire has a smooth feel and is neutral. The connections between the switch and the ceiling are easily recognized via a phase tester.
Check the Power Supply
Before starting, remember to check whether the main supply to the installation spot is disconnected. See if you have removed the fuses and the breakers are turned off. Now, press the switch and turn it off. You must confirm this using the tester by bringing it near the electric wires.
Test Polarity
For a polarity check, you have to perform a test with the fixture and ceiling wires. Hang the fixture temporarily (without mounting) and make contact between one wire from the fixture and the live wire (the black one) coming from the switch. In the same way, join another black wire to the white electric wire.
Now, carefully attach a probe on the sleeve of the fixture with a voltmeter. Connect the other one with the ground wire. Ask someone to turn the power on. If the voltage meter shows a positive measurement, it will refer to the reversal of the polarity. Reverse the connection between wires to correct it. After you have done all the basic work, it is time to mount the fixture.
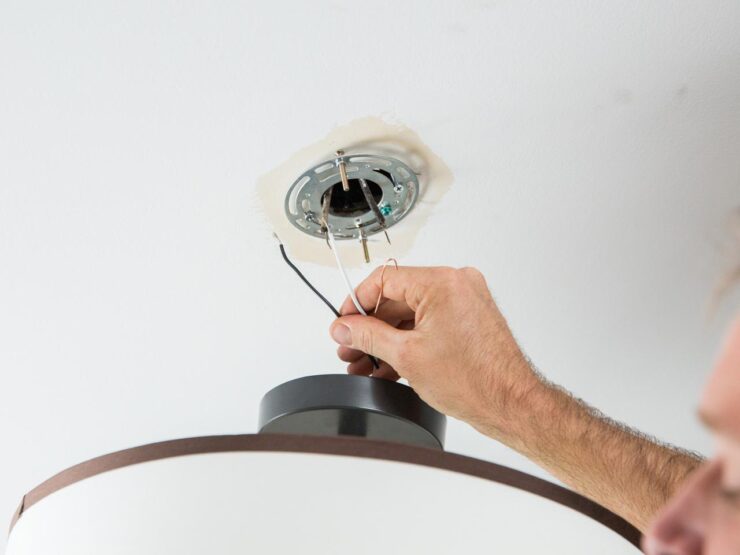
Match the Mounting Location
The next step is to observe the mounting base of the fixture and check whether it perfectly fits the rose. If this is the first time you are installing an electric device in that area, you are required to make some effort and take measurements. Also, put a mark where you have to place the fixture if this is the case.
After you confirm the dimensions of both the ceiling and fixture base, it is ready for mounting. With high focus, align the holes in the ceiling with the fixture bolts. Now, adjust the base in a way that the electric wires are hanging from the switch. Use the nuts and tighten them onto the bolts through a wrench.
Connect All Wires
Again check if the power supply is disconnected to ensure safe activity. Now cut the outer insulation layer approximately half-inch from the edge of both black wires through a stripper. While considering the nature of all wires, start making connections with the light fixture.
To prevent the loosening up of conducting wires, tighten them with the wire nuts. Join the earth wire to the small pin on the fixture body and secure it in that position. If you do not find any pin for the ground wire, make a hole and place a ground screw through a screwdriver. Make the connection between the earth wire and the screw.
Test the Light Fixture
Insert a bulb in the light fitting if required and twist it for secure adjustment. Now, bring the fuses back to their original state, and turn on the current supply from the main circuit. Lastly, test the functioning of that luminaire by turning on its switch on the wall. There you go.
Safety Measures
Please look for the damaged wires, quality of insulation, and broken wires. If you find some defects in the circuit series or the light fixture, replace them with new ones. Furthermore, do not forget to use the voltage tester before you perform tests with different wires.
Before you start working, make sure that no other person enters that room. It is to avoid the dangerous situation where someone might turn on the light switch. However, you can keep someone who is familiar with this task for assistance near you. Also, use a stable ladder for reaching the ceiling.
FAQ
Q: Can I use any pliers for securing wire connections?
A: While any pliers can technically be used, it is recommended to use pliers specifically designed for electrical work, such as lineman’s pliers or needle-nose pliers. These pliers have a better grip and allow for more precise twisting of wires.
Q: Do I need to use a non-contact voltage tester, or can I use a contact tester?
A: It is recommended to use a non-contact voltage tester for safety reasons, as it allows you to test for voltage without actually touching the wires. Contact testers can be more dangerous, as they require you to make physical contact with the wires.
Q: How do I know if I need to use wire nuts or twist-on-connectors?
A: Wire nuts or twist-on-connectors are typically used for connecting wires where less voltage is flowing, such as with light or fan fixtures. For higher voltage connections, other types of connectors may be required.
Q: What should I do if I encounter different wire color codes than what is listed in this article? A: It is important to research and follow the appropriate wire color codes for your specific region or country. If you are unsure, consult a professional electrician for guidance.
Q: Do I need to turn off the power supply before starting any electrical work?
A: Yes, it is important to turn off the power supply and confirm that the electricity is disconnected before starting any electrical work to avoid the risk of electric shock or fire.
Q: How do I test for polarity?
A: To test for polarity, temporarily hang the fixture and connect one wire from the fixture to the live wire (the black one) coming from the switch. Connect the other black wire to the white electric wire. Then, use a voltmeter to check for a positive measurement, which indicates reversed polarity. If the polarity is reversed, switch the wire connections to correct it.
Q: What should I do if I encounter damaged wires or broken insulation?
A: If you encounter damaged wires or broken insulation, replace them with new ones before proceeding with any electrical work. It is also important to regularly inspect and maintain the electrical system to prevent damage or wear over time.
Q: Can I perform electrical work without any prior experience or training?
A: It is not recommended to perform electrical work without prior experience or training, as it can be dangerous and potentially result in injury or damage. If you are unsure about any aspect of electrical work, it is best to consult a professional electrician for assistance.
Conclusion
I hope you find it convenient to make electric connections for mounting the fixture. You must identify the wires correctly. If you still feel troubled about getting the coding right, I advise you to seek help from a professional and skilled electrician. There are minimal chances of any risk if you follow the instructions correctly and go through the fixture’s manual.


